This tutorial shows you how to configure SQL Server AlwaysOn availability groups (AG) using DH2i DxEnterprise and Google Kubernetes Engine (GKE). This offering helps you achieve high availability for your SQL Server databases running on containers in Kubernetes.
Infrastructure Design

GCP Resources that will be created for this demonstration
- VPC Network named network-1
- privatenet subnet
- publicnet subnet
- Private Service Connection
- Firewall rule to allow port 1433 from bastion host to GKE nodes
- Firewall rule to allow RDP from your laptop\pc to bastion host
- Cloud Firestore instance for providing shared nfs storage to containers\pods.
- Bastion host with windows server 2019 and sql server 2017 express edition. Comes preinstalled with SSMS.
- 3 Node internal Google kubernetes engine cluster with 3 compute engine nodes
- A optional nat gateway (not represented in the above diagram) to allow cluster to download images and updates from internet. You will also need internet access to activate DxEnterprise license.
Prerequisite
- A valid DxEnterprise license with availability group management features and tunnels enabled is required to proceed with this demo. A fully featured developer edition is available for free for non-production use at
https://dh2i.com/dxenterprise-dxodyssey-developer-edition. - A Google Cloud Project
- Knowledge of connecting to SQL Server and creating database objects.
- Basic knowledge of Google Cloud and Kubernetes is preferred.
Code Repository
All the sample code files are hosted in the GiT Repository. Open CloudShell and clone the repository.
git clone https://github.com/sa-proj/proj-containers.git
Building the Cloud Infrastructure
We will use CloudShell and GCLOUD commands to provision the required infrastructure as described in the infrastructure design. Navigate to gke-sql-server-always-on-failover-type-external-dh2i folder to start.
cd proj-containers/gke-sql-server-always-on-failover-type-external-dh2i
You can run the gcloud-infrastructure.sh (make sure to edit the Project ID and <<YOUR PUBLIC IP HERE>> with relevant details before you continue) script to create all resources in one go as described in the infrastructure design section or you can follow along with the instructions in next section to modify the resource name and resource properties and then go step by step.
Open Editor to modify the contents of gcloud-infrastructure.sh

Once you have updated the script with correct Project ID and your public IP details as shown below you can execute the script. Don’t forget to specify /32 at the end of your Public IP.
export GCP_PROJECT_ID='my-sample-project-1'
---
export MY_IP='101.101.101.101/32'
Execute the script and wait while resources are being created. I can take up to 10-15 mins for all resources to be created successfully.
Note – You will need to update the Image Name and GKE version in case of VM Image and GKE versions are deprecated. See step by step section for more details:
chmod u+x gcloud-infrastructure.sh
./gcloud-infrastructure.sh
Creating Cloud resources step by step
To start, export variables that will be used to provision infrastructure using GCLOUD commands. This has details on network name, subnet names, IP ranges etc.
Before executing the below statements you will need to ensure that you have correctly supplied the GCP Project ID. You will also need to ensure that you replace <<YOUR PUBLIC IP HERE>> for your laptop as this IP will be used while creating firewall rule to allow RDP to bastion host from your laptop\pc. You can check here to find your public IP address.
export GCP_PROJECT_ID='xxxxxxxxxxxxxxxxx'
export REGION='us-central1'
export ZONE_A='us-central1-a'
export ZONE_B='us-central1-b'
export NETWORK_NAME='network-1'
export PUBLIC_SUBNET='publicnet'
export PUBLIC_SUBNET_RANGE='10.0.1.0/24'
export PRIVATE_SUBNET='privatenet'
export PRIVATE_SUBNET_RANGE='10.0.0.0/24'
export MY_IP='<<YOUR PUBLIC IP HERE>>'
export BASTION_HOST_TAG='bastion-host'
export BASTION_HOST_NAME='bastion-host-1'
export CLOUDSHELL_PUBLIC_IP="$(curl https://ipinfo.io/ip)/32"
export CLUSTERNAME='gke-cluster-1'
export PRIVATE_SERVICE_CONNECT_RANGE_NAME="$NETWORK_NAME-psc-range"
export PRIVATE_SERVICE_CONNECT_ADDRESS="10.0.2.0"
Enable the APIS and Services to be used for this demo
gcloud services enable file.googleapis.com
gcloud services enable compute.googleapis.com
gcloud services enable container.googleapis.com
gcloud services enable containerregistry.googleapis.com
gcloud services enable servicenetworking.googleapis.com
Create a custom VPC network name network-1
gcloud compute networks create $NETWORK_NAME \
    --project=$GCP_PROJECT_ID \
    --subnet-mode=custom
Create a private and a public subnet and enable private google access
gcloud compute networks subnets create $PRIVATE_SUBNET \
    --project=$GCP_PROJECT_ID \
    --range=$PRIVATE_SUBNET_RANGE \
    --network=$NETWORK_NAME \
    --region=$REGION \
    --enable-private-ip-google-access
gcloud compute networks subnets create $PUBLIC_SUBNET \
    --project=$GCP_PROJECT_ID \
    --range=$PUBLIC_SUBNET_RANGE \
    --network=$NETWORK_NAME \
    --region=$REGION \
    --enable-private-ip-google-access
Create firewall rules to allow RDP access from your your laptop to bastion host and MSSQL access for pods with SQL Server 2019 hosted in Google Kubernetes engine.
gcloud compute --project=$GCP_PROJECT_ID firewall-rules create allow-rdp-access \
    --direction=INGRESS \
    --priority=1000 \
    --network=$NETWORK_NAME \
    --action=ALLOW \
    --rules=tcp:3389 \
    --source-ranges=$MY_IP \
    --target-tags=$BASTION_HOST_TAG
gcloud compute --project=$GCP_PROJECT_ID firewall-rules create allow-mssql-access \
    --direction=INGRESS \
    --priority=1000 \
    --network=$NETWORK_NAME \
    --action=ALLOW \
    --rules=tcp:1433 \
    --source-ranges=$PUBLIC_SUBNET_RANGE \
    --target-tags=$BASTION_HOST_TAG
Create a private service connection for your VPC network named network-1
gcloud compute addresses create $PRIVATE_SERVICE_CONNECT_RANGE_NAME \
    --global \
    --purpose=VPC_PEERING \
    --addresses=$PRIVATE_SERVICE_CONNECT_ADDRESS \
    --prefix-length=24 \
    --description="PRIVATE SERVICE CONNECTION" \
    --network=$NETWORK_NAME
gcloud services vpc-peerings connect \
    --service=servicenetworking.googleapis.com \
    --ranges=$PRIVATE_SERVICE_CONNECT_RANGE_NAME \
    --network=$NETWORK_NAME \
    --project=$GCP_PROJECT_ID
Create a filestore instance using private service connection as with connect mode set to PRIVATE_SERVICE_ACCESS. Any backups files or files that needs to be shared across servers can be dumped into this nfs share.
gcloud beta filestore instances create nfs-server-1 \
    --zone=$ZONE_B \
    --tier=BASIC_HDD \
    --file-share=name="common",capacity=1TB \
    --network=name=$NETWORK_NAME,reserved-ip-range=$PRIVATE_SERVICE_CONNECT_RANGE_NAME,connect-mode=PRIVATE_SERVICE_ACCESS
Create a bastion host. I am using Windows Server 2019 with SQL Server Express edition installed on it as image because this will have management studio installed and configured. You can use any windows server image and install SSMS on it separately.
Note – Make sure to update the image to latest version before executing. You can check the latest image name from Compute Engine > Images > Filter based on sql-2017-express and you will find the latest available image name.
gcloud beta compute --project=$GCP_PROJECT_ID instances create $BASTION_HOST_NAME \
    --zone=$ZONE_A \
    --machine-type=n2d-standard-2 \
    --subnet=$PUBLIC_SUBNET \
    --network-tier=PREMIUM \
    --maintenance-policy=MIGRATE \
    --tags=$BASTION_HOST_TAG \
    --image=sql-2017-express-windows-2019-dc \
    --image-project=windows-sql-cloud \
    --boot-disk-size=50GB \
    --boot-disk-type=pd-balanced \
    --boot-disk-device-name=$BASTION_HOST_NAME
Create a nat router so the private kubernetes cluster will have internet access without being exposed on the internet. This will used to to download updates, images and activating external HADR providers.
gcloud compute routers create nat-router \
    --network $NETWORK_NAME \
    --region $REGION
gcloud compute routers nats create nat-config \
    --router-region $REGION \
    --router nat-router \
    --nat-all-subnet-ip-ranges \
    --auto-allocate-nat-external-ips
Create a private kubernetes cluster. You will need to update the cluster-version to available version in case the one mentioned in the script is outdated. You can check current versions for GKE here.
gcloud beta container --project $GCP_PROJECT_ID clusters create $CLUSTERNAME \
    --zone $ZONE_B \
    --no-enable-basic-auth \
    --cluster-version "1.20.9-gke.701" \
    --release-channel "regular" \
    --machine-type "e2-medium" \
    --image-type "COS_CONTAINERD" \
    --disk-type "pd-standard" \
    --disk-size "100" \
    --metadata disable-legacy-endpoints=true \
    --max-pods-per-node "110" \
    --num-nodes "3" \
    --enable-private-nodes \
    --master-ipv4-cidr "10.0.3.0/28" \
    --enable-master-global-access \
    --enable-ip-alias \
    --network "projects/$GCP_PROJECT_ID/global/networks/$NETWORK_NAME" \
    --subnetwork "projects/$GCP_PROJECT_ID/regions/$REGION/subnetworks/$PRIVATE_SUBNET" \
    --no-enable-intra-node-visibility \
    --default-max-pods-per-node "110" \
    --enable-master-authorized-networks \
    --master-authorized-networks $CLOUDSHELL_PUBLIC_IP \
    --addons HorizontalPodAutoscaling,HttpLoadBalancing,GcePersistentDiskCsiDriver \
    --enable-autoupgrade \
    --enable-autorepair \
    --max-surge-upgrade 1 \
    --max-unavailable-upgrade 0 \
    --enable-shielded-nodes \
    --node-locations $ZONE_B
Obtain credentials to set the context for your kubernetes cluster and be able to authenticate to the cluster from cloudshell.
gcloud container clusters get-credentials $CLUSTERNAME \
    --zone $ZONE_B --project $GCP_PROJECT_ID
Optional: Prepare the SQL Server & DH2i custom container image
This step is only required in case you wish to use your own docker image. A image is already pushed to docker hub and available at sandeeparora/sql2k19-hadr-dh2i repository.
Use the below Dockerfile to build the image
FROM mcr.microsoft.com/mssql/server:2019-latest
USER root

#Install dotnet
RUN apt-get update \
   && apt-get install -y apt-utils \
   && ACCEPT_EULA=Y apt-get upgrade -y \
   && apt-get install -y wget \
   && wget --no-dns-cache https://packages.microsoft.com/config/ubuntu/18.04/packages-microsoft-prod.deb -O packages-microsoft-prod.deb \
   && dpkg -i packages-microsoft-prod.deb \
   && apt-get update \
   && apt-get install -y dotnet-runtime-3.1 zip \
   && dpkg --purge packages-microsoft-prod \
   && apt-get purge -y wget \
   && apt-get clean \
   && rm packages-microsoft-prod.deb \
   && rm -rf /var/lib/apt/lists/*

#Download and unpack DxE, setup permissions
ADD https://repos.dh2i.com/container/ ./dxe.tgz
RUN tar zxvf dxe.tgz && rm dxe.tgz \
   && chown -R mssql /var/opt/mssql \
   && chmod -R 777 /opt/dh2i /etc/dh2i

#Finish setup
EXPOSE 7979 7985
ENV DX_HAS_MSSQLSERVER=1
USER mssql
ENTRYPOINT ["/opt/dh2i/sbin/dxstart.sh"]
On cloudshell run the following commands to build the image and push to Google Container registry. Make sure to set you Project ID before executing the below cmdlets.
export GCP_PROJECT_ID='xxxxxxxxxxxxxx'
cd ~/proj-containers/sql2k19-hadr-dh2i-image/
docker build -t gcr.io/$GCP_PROJECT_ID/sql2k19-hadr-dh2i .
docker push gcr.io/$GCP_PROJECT_ID/sql2k19-hadr-dh2i
Switch back to original work directory
cd ~/proj-containers/gke-sql-server-always-on-failover-type-external-dh2i
Create Google Kubernetes Engine Resources for SQL Server 2019
You will need to create a secret that will be used for SA account when running the MSSQL container. The password needs to be a strong password otherwise the deployment will fail.
kubectl create secret generic sql-server-secret \
    --from-literal=MSSQL_SA_PASSWORD="P@ssw0rd"
The nodes need to be labelled for Primary and secondaries for placement of pods on the cluster. Add labels to the nodes and later these labels will be used during creation of each StatefulSet using nodeSelector field of PodSpec.
Check names for all nodes participating in the cluster
kubectl get nodes
Output:

Copy the node names returned by above command and replace them with node-1, node-2 and node-3 in the below code snippet and execute them to assign primary and secondary roles to each node respectively. Node with role ags-primary will host the primary Always On replica, Node(s) with role ags-secondary-N will host secondary replicas.
kubectl label node node-1 role=ags-primary
kubectl label node node-2 role=ags-secondary-1
kubectl label node node-3 role=ags-secondary-2
In my case the commands that ran in CloudShell are below
kubectl label node gke-gke-cluster-1-default-pool-bf1f5db8-6tdx  role=ags-primary
kubectl label node gke-gke-cluster-1-default-pool-bf1f5db8-9b19 role=ags-secondary-1
kubectl label node gke-gke-cluster-1-default-pool-bf1f5db8-xslh role=ags-secondary-2
NFS Share for SQL Backups for All Replicas
Create a persistent volume and persistent volume claim for Filestore. This will be mounted to all pods running SQL Server 2019. This will be used for backups across all SQL instances.
Modify the common.yaml file in the Visual Editor in CloudShell with IP address of Filestore. To check the IP address allocated for Filestore, Navigate to Navigation Menu > STORAGE > Filestore
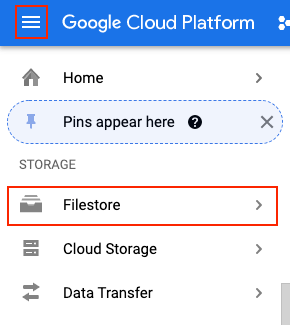
Copy the IP Address from the console output and update the common.yaml file

Once the file is updated run the kubectl apply command to create PV and PVC to allocate storage from NFS. You can modify the allocation if you like the current YAML config only has 20 GB allocated.
kubectl apply -f common.yaml
Below is the YAML config file for you reference.
apiVersion: v1
kind: PersistentVolume
metadata:
  name: mssql-common-volume
spec:
  capacity:
    storage: 20Gi
  accessModes:
  - ReadWriteMany
  nfs:
    path: /common
    server: 10.0.2.2 #Change the IP to Filestore IP
---
apiVersion: v1
kind: PersistentVolumeClaim
metadata:
  name: mssql-common-volume-claim
spec:
  accessModes:
  - ReadWriteMany
  storageClassName: ""
  volumeName: mssql-common-volume
  resources:
    requests:
      storage: 20Gi
Now we will create StatefulSets for all SQL replicas.
StatefulSet: SQL-1
We will create 4 volume claims for
- DXE volume (External HA)
- Data volume (MDF files)
- Log volume (LDF files)
- Base volume,
and StatefulSet for SQL-1 and service to expose SQL-1 using internal load balancer.
Note: If you are using your own container image from container registry then make sure to update the container image in the config file from sandeeparora/sql2k19-hadr-dh2i to gcr.io/<PROJECT_ID>/sql2k19-hadr-dh2i
kubectl apply -f sql-1.yaml
Below is the YAML config file for you reference.
apiVersion: v1
kind: PersistentVolumeClaim
metadata:
  name: mssql1-dxe-volume
spec:
  accessModes:
    - ReadWriteOnce
  resources:
    requests:
      storage: 2Gi
---
apiVersion: v1
kind: PersistentVolumeClaim
metadata:
  name: mssql1-base-volume
spec:
  accessModes:
    - ReadWriteOnce
  resources:
    requests:
      storage: 2Gi
---
apiVersion: v1
kind: PersistentVolumeClaim
metadata:
  name: mssql1-data-volume
spec:
  accessModes:
    - ReadWriteOnce
  resources:
    requests:
      storage: 10Gi
---
apiVersion: v1
kind: PersistentVolumeClaim
metadata:
  name: mssql1-log-volume
spec:
  accessModes:
    - ReadWriteOnce
  resources:
    requests:
      storage: 10Gi
---
apiVersion: apps/v1
kind: StatefulSet
metadata:
  name: sql-1
spec:
  serviceName: "sql-1"
  replicas: 1
  selector:
    matchLabels:
      app: sql-1
  template:
    metadata:
      labels:
        app: sql-1
        hadr: turn-on
    spec:
      securityContext:
        runAsUser: 0
        runAsGroup: 0
      terminationGracePeriodSeconds: 10
      nodeSelector:
       role: ags-primary
      containers:
      - name: mssql
        image: sandeeparora/sql2k19-hadr-dh2i
        ports:
        - containerPort: 1433
        - containerPort: 7979
        env:
        - name: MSSQL_PID
          value: "Developer"
        - name: ACCEPT_EULA
          value: "Y"
        - name: SA_PASSWORD
          valueFrom:
            secretKeyRef:
              name: sql-server-secret
              key: MSSQL_SA_PASSWORD
        - name: MSSQL_AGENT_ENABLED
          value: "true"
        - name: MSSQL_ENABLE_HADR
          value: "1"
        - name: MSSQL_DATA_DIR
          value: /var/opt/mssql/data
        - name: MSSQL_LOG_DIR
          value: /var/opt/mssql/log
        - name: MSSQL_BACKUP_DIR
          value: /var/opt/mssql/backup

        volumeMounts:
        - name: mssql1-base-volume
          mountPath: /var/opt/mssql
        - name: mssql1-log-volume
          mountPath: /var/opt/mssql/log
        - name: mssql1-data-volume
          mountPath: /var/opt/mssql/data
        - name: mssql-common-volume
          mountPath: /var/opt/mssql/backup
        - name: mssql1-dxe-volume
          mountPath: /etc/dh2i
      volumes:
      - name: mssql1-base-volume
        persistentVolumeClaim:
          claimName: mssql1-base-volume
      - name: mssql1-data-volume
        persistentVolumeClaim:
          claimName: mssql1-data-volume
      - name: mssql1-log-volume
        persistentVolumeClaim:
          claimName: mssql1-log-volume
      - name: mssql-common-volume
        persistentVolumeClaim:
          claimName: mssql-common-volume-claim
      - name: mssql1-dxe-volume
        persistentVolumeClaim:
          claimName: mssql1-dxe-volume
---
apiVersion: v1
kind: Service
metadata:
  name: sql-1-external-service
  annotations:
    networking.gke.io/load-balancer-type: "Internal"
spec:
  selector:
    app: sql-1
  ports:
    - name: mssql
      protocol: TCP
      port: 1433
      targetPort: 1433
    - name: dxe
      protocol: TCP
      port: 7979
      targetPort: 7979
  type: LoadBalancer
StatefulSet: SQL-2
Create 4 volume claims for
- DXE volume (External HA)
- Data volume (MDF files)
- Log volume (LDF files)
- Base volume
Create StatefulSet for SQL-2 and service to expose SQL-2 using internal load balancer.
Note: If you are using your own container image from container registry then make sure to update the container image in the config file from sandeeparora/sql2k19-hadr-dh2i to gcr.io/<PROJECT_ID>/sql2k19-hadr-dh2i
kubectl apply -f sql-2.yaml
Below is the YAML config file for you reference.
apiVersion: v1
kind: PersistentVolumeClaim
metadata:
  name: mssql2-dxe-volume
spec:
  accessModes:
    - ReadWriteOnce
  resources:
    requests:
      storage: 2Gi
---
apiVersion: v1
kind: PersistentVolumeClaim
metadata:
  name: mssql2-base-volume
spec:
  accessModes:
    - ReadWriteOnce
  resources:
    requests:
      storage: 2Gi
---
apiVersion: v1
kind: PersistentVolumeClaim
metadata:
  name: mssql2-data-volume
spec:
  accessModes:
    - ReadWriteOnce
  resources:
    requests:
      storage: 10Gi
---
apiVersion: v1
kind: PersistentVolumeClaim
metadata:
  name: mssql2-log-volume
spec:
  accessModes:
    - ReadWriteOnce
  resources:
    requests:
      storage: 10Gi
---
apiVersion: apps/v1
kind: StatefulSet
metadata:
  name: sql-2
spec:
  serviceName: "sql-2"
  replicas: 1
  selector:
    matchLabels:
      app: sql-2
  template:
    metadata:
      labels:
        app: sql-2
        hadr: turn-on
    spec:
      securityContext:
        runAsUser: 0
        runAsGroup: 0
      terminationGracePeriodSeconds: 10
      nodeSelector:
       role: ags-secondary-1
      containers:
      - name: mssql
        image: sandeeparora/sql2k19-hadr-dh2i
        ports:
        - containerPort: 1433
        - containerPort: 7979
        env:
        - name: MSSQL_PID
          value: "Developer"
        - name: ACCEPT_EULA
          value: "Y"
        - name: SA_PASSWORD
          valueFrom:
            secretKeyRef:
              name: sql-server-secret
              key: MSSQL_SA_PASSWORD
        - name: MSSQL_AGENT_ENABLED
          value: "true"
        - name: MSSQL_ENABLE_HADR
          value: "1"
        - name: MSSQL_DATA_DIR
          value: /var/opt/mssql/data
        - name: MSSQL_LOG_DIR
          value: /var/opt/mssql/log
        - name: MSSQL_BACKUP_DIR
          value: /var/opt/mssql/backup

        volumeMounts:
        - name: mssql2-base-volume
          mountPath: /var/opt/mssql
        - name: mssql2-log-volume
          mountPath: /var/opt/mssql/log
        - name: mssql2-data-volume
          mountPath: /var/opt/mssql/data
        - name: mssql-common-volume
          mountPath: /var/opt/mssql/backup
        - name: mssql2-dxe-volume
          mountPath: /etc/dh2i
      volumes:
      - name: mssql2-base-volume
        persistentVolumeClaim:
          claimName: mssql2-base-volume
      - name: mssql2-data-volume
        persistentVolumeClaim:
          claimName: mssql2-data-volume
      - name: mssql2-log-volume
        persistentVolumeClaim:
          claimName: mssql2-log-volume
      - name: mssql-common-volume
        persistentVolumeClaim:
          claimName: mssql-common-volume-claim
      - name: mssql2-dxe-volume
        persistentVolumeClaim:
          claimName: mssql2-dxe-volume
---
apiVersion: v1
kind: Service
metadata:
  name: sql-2-external-service
  annotations:
    networking.gke.io/load-balancer-type: "Internal"
spec:
  selector:
    app: sql-2
  ports:
    - name: mssql
      protocol: TCP
      port: 1433
      targetPort: 1433
    - name: dxe
      protocol: TCP
      port: 7979
      targetPort: 7979
  type: LoadBalancer
StatefulSet: SQL-3
Create 4 volume claims for
- DXE volume (External HA)
- Data volume (MDF files)
- Log volume (LDF files)
- Base volume
Create StatefulSet for SQL-3 and service to expose SQL-3 using internal load balancer.
Note: If you are using your own container image from container registry then make sure to update the container image in the config file from sandeeparora/sql2k19-hadr-dh2i to gcr.io/<PROJECT_ID>/sql2k19-hadr-dh2i
kubectl apply -f sql-3.yaml
Below is the YAML config file for you reference.
apiVersion: v1
kind: PersistentVolumeClaim
metadata:
  name: mssql3-dxe-volume
spec:
  accessModes:
    - ReadWriteOnce
  resources:
    requests:
      storage: 2Gi
---
apiVersion: v1
kind: PersistentVolumeClaim
metadata:
  name: mssql3-base-volume
spec:
  accessModes:
    - ReadWriteOnce
  resources:
    requests:
      storage: 2Gi
---
apiVersion: v1
kind: PersistentVolumeClaim
metadata:
  name: mssql3-data-volume
spec:
  accessModes:
    - ReadWriteOnce
  resources:
    requests:
      storage: 10Gi
---
apiVersion: v1
kind: PersistentVolumeClaim
metadata:
  name: mssql3-log-volume
spec:
  accessModes:
    - ReadWriteOnce
  resources:
    requests:
      storage: 10Gi
---
apiVersion: apps/v1
kind: StatefulSet
metadata:
  name: sql-3
spec:
  serviceName: "sql-3"
  replicas: 1
  selector:
    matchLabels:
      app: sql-3
  template:
    metadata:
      labels:
        app: sql-3
        hadr: turn-on
    spec:
      securityContext:
        runAsUser: 0
        runAsGroup: 0
      terminationGracePeriodSeconds: 10
      nodeSelector:
       role: ags-secondary-2
      containers:
      - name: mssql
        image: sandeeparora/sql2k19-hadr-dh2i
        ports:
        - containerPort: 1433
        - containerPort: 7979
        env:
        - name: MSSQL_PID
          value: "Developer"
        - name: ACCEPT_EULA
          value: "Y"
        - name: SA_PASSWORD
          valueFrom:
            secretKeyRef:
              name: sql-server-secret
              key: MSSQL_SA_PASSWORD
        - name: MSSQL_AGENT_ENABLED
          value: "true"
        - name: MSSQL_ENABLE_HADR
          value: "1"
        - name: MSSQL_DATA_DIR
          value: /var/opt/mssql/data
        - name: MSSQL_LOG_DIR
          value: /var/opt/mssql/log
        - name: MSSQL_BACKUP_DIR
          value: /var/opt/mssql/backup

        volumeMounts:
        - name: mssql3-base-volume
          mountPath: /var/opt/mssql
        - name: mssql3-log-volume
          mountPath: /var/opt/mssql/log
        - name: mssql3-data-volume
          mountPath: /var/opt/mssql/data
        - name: mssql-common-volume
          mountPath: /var/opt/mssql/backup
        - name: mssql3-dxe-volume
          mountPath: /etc/dh2i
      volumes:
      - name: mssql3-base-volume
        persistentVolumeClaim:
          claimName: mssql3-base-volume
      - name: mssql3-data-volume
        persistentVolumeClaim:
          claimName: mssql3-data-volume
      - name: mssql3-log-volume
        persistentVolumeClaim:
          claimName: mssql3-log-volume
      - name: mssql-common-volume
        persistentVolumeClaim:
          claimName: mssql-common-volume-claim
      - name: mssql3-dxe-volume
        persistentVolumeClaim:
          claimName: mssql3-dxe-volume
---
apiVersion: v1
kind: Service
metadata:
  name: sql-3-external-service
  annotations:
    networking.gke.io/load-balancer-type: "Internal"
spec:
  selector:
    app: sql-3
  ports:
    - name: mssql
      protocol: TCP
      port: 1433
      targetPort: 1433
    - name: dxe
      protocol: TCP
      port: 7979
      targetPort: 7979
  type: LoadBalancer
Connect to SQL Server Pods on GKE
- Login to the bastion host by using external IP to RDP. You can generate the password from Set Windows password button

2. Get the IP address of all services that are exposing the SQL Server Service. Execute the below command in CloudShell.
kubectl get all -o wide

3. Use SSMS to connect with IP address as ServerName, use sql authentication, ‘sa’ as username ‘P@ssw0rd’ as password (specified while creating the secret) and verify that all instances are available and their agent is up and HADR is enabled by expanding the Always On Availability Groups folder.
4. Create a sample database on sql-1 instance using SSMS.
Configure the DxEnterprise cluster on the SQL Server containers deployed
Follow Official documentation or below steps to create availability group.
You will need activation code to proceed. I am using developer edition for the demo purposes. A fully featured developer edition is available for free for non-production use and can be downloaded here. Once you have subscribed you can login and request for a developer license and it will be emailed to you on your registered ID. Below is the email that I received almost instantaneously after successfully requesting for the license.

Once you have the license you can proceed.
On Primary POD sql-1-0
1. Activate the DxEnterprise license using the command
kubectl exec sql-1-0 -- dxcli activate-server XXXX-XXXX-XXXX-XXXX
2. Add a Vhost to the cluster
kubectl exec sql-1-0 -- dxcli cluster-add-vhost vhost1 *127.0.0.1 sql-1-0
3. Encrypt the SQL Server sysadmin password . The encrypted password will be used to create the availability group in the next step
kubectl exec sql-1-0 -- dxcli encrypt-text P@ssw0rd
Output of above command: OAfe63v3+APrmqyDdnSnhQ==
4. Add an availability group to the Vhost. The SQL Server sysadmin password must be encrypted Use the password generated in the last step. ags1 is the availability group name in the below command.
kubectl exec sql-1-0 -- dxcli add-ags vhost1 ags1 "sql-1-0|mssqlserver|sa|OAfe63v3+APrmqyDdnSnhQ==|5022|synchronous_commit|40001"
5. Set a One-Time PassKey (OTPK). The output from this command will be used to join the other nodes to the DxEnterprise cluster
kubectl exec sql-1-0 -- dxcli set-otpk
Output of above command: OTPK: **************************************** Good Until: 2021-09-18T10:47:13
On Secondary 1 POD sql-2-0
1. Activate the DxEnterprise license using the command
kubectl exec sql-2-0 -- dxcli activate-server XXXX-XXXX-XXXX-XXXX
2. Join the second node to the DxEnterprise cluster. Use the default NAT proxy of match.dh2i.com. Use the OTPK generated in the previous steps instead of asterisk
kubectl exec sql-2-0 -- dxcli join-cluster-ex match.dh2i.com **************************************** true
3. Add the second node to the existing availability group. The SQL Server sysadmin password must be encrypted. Use the password that you encrypted in previous steps
kubectl exec sql-2-0 -- dxcli add-ags-node vhost1 ags1 "sql-2-0|mssqlserver|sa|OAfe63v3+APrmqyDdnSnhQ==|5022|synchronous_commit|40002"
On Secondary 2 POD sql-3-0
1. Activate the DxEnterprise license using the command
kubectl exec sql-3-0 -- dxcli activate-server XXXX-XXXX-XXXX-XXXX
2. Join the second node to the DxEnterprise cluster. Use the default NAT proxy of match.dh2i.com. Use the OTPK generated in the previous steps instead of asterisk
kubectl exec sql-3-0 -- dxcli join-cluster-ex match.dh2i.com **************************************** true
3. Add the second node to the existing availability group. The SQL Server sysadmin password must be encrypted. Use the password that you encrypted in previous steps
kubectl exec sql-3-0 -- dxcli add-ags-node vhost1 ags1 "sql-3-0|mssqlserver|sa|OAfe63v3+APrmqyDdnSnhQ==|5022|synchronous_commit|40003"
Back On Primary POD sql-1-0
1. Add databases to the availability group. The database name used here and already created on sql-1-0 is named sample.
kubectl exec sql-1-0 -- dxcli add-ags-databases vhost1 ags1 sample
2. Add a listener to the availability group
kubectl exec sql-1-0 -- dxcli add-ags-listener vhost1 ags1 44444
Configure Always On availability group listener
Create a service of type internal load balancer to expose the listener Ip and port on the network.
kubectl apply -f listener.yaml
Below is the YAML config file for you reference.
apiVersion: v1
kind: Service
metadata:
  name: agslistener-service
  annotations:
    networking.gke.io/load-balancer-type: "Internal"
spec:
  selector:
    hadr: turn-on
  ports:
  - protocol: TCP
    port: 44444
    targetPort: 44444
  type: LoadBalancer
Test the AG Listener
- Run kubectl get all and grab the IP addresses of the listener.
kubectl get all
2. RDP back into the bastion host and connect to the listenerIP,44444 using ‘sa’ and ‘P@ssw0rd’.
3. You will be connected to the Primary\Active node. The Cluster type you will see will be external.
Congratulations! you have successfully setup Always On Availability Groups on SQL Server 2019 on Google Kubernetes Engine.

Excellent post, Sandeep. You’re such a weekend warrior. Totally impressed with how you got SQL AG and DxEnterprise container deployed in GKE and this article put together in a single weekend.
If you or anyone needs any assistance with DxEnterprise, feel free to reach out to me. I’ll be sure to get you the help. Cheers.
LikeLike
Thank you and will definitely will reach out in case I run into issues with any Project work.
LikeLike