Background
I was looking to build my own portfolio website for some time now but the problem was that I am not a UI Developer and I always wanted a kick-ass website. Long story short, I got nowhere with it until recently, when I was working with a customer to help them move their e-commerce website to AWS. There were some frontend issues that I ended up helping the customer with and that made me realize that I used to be developer when I started my career but IT choose infrastructure for me.
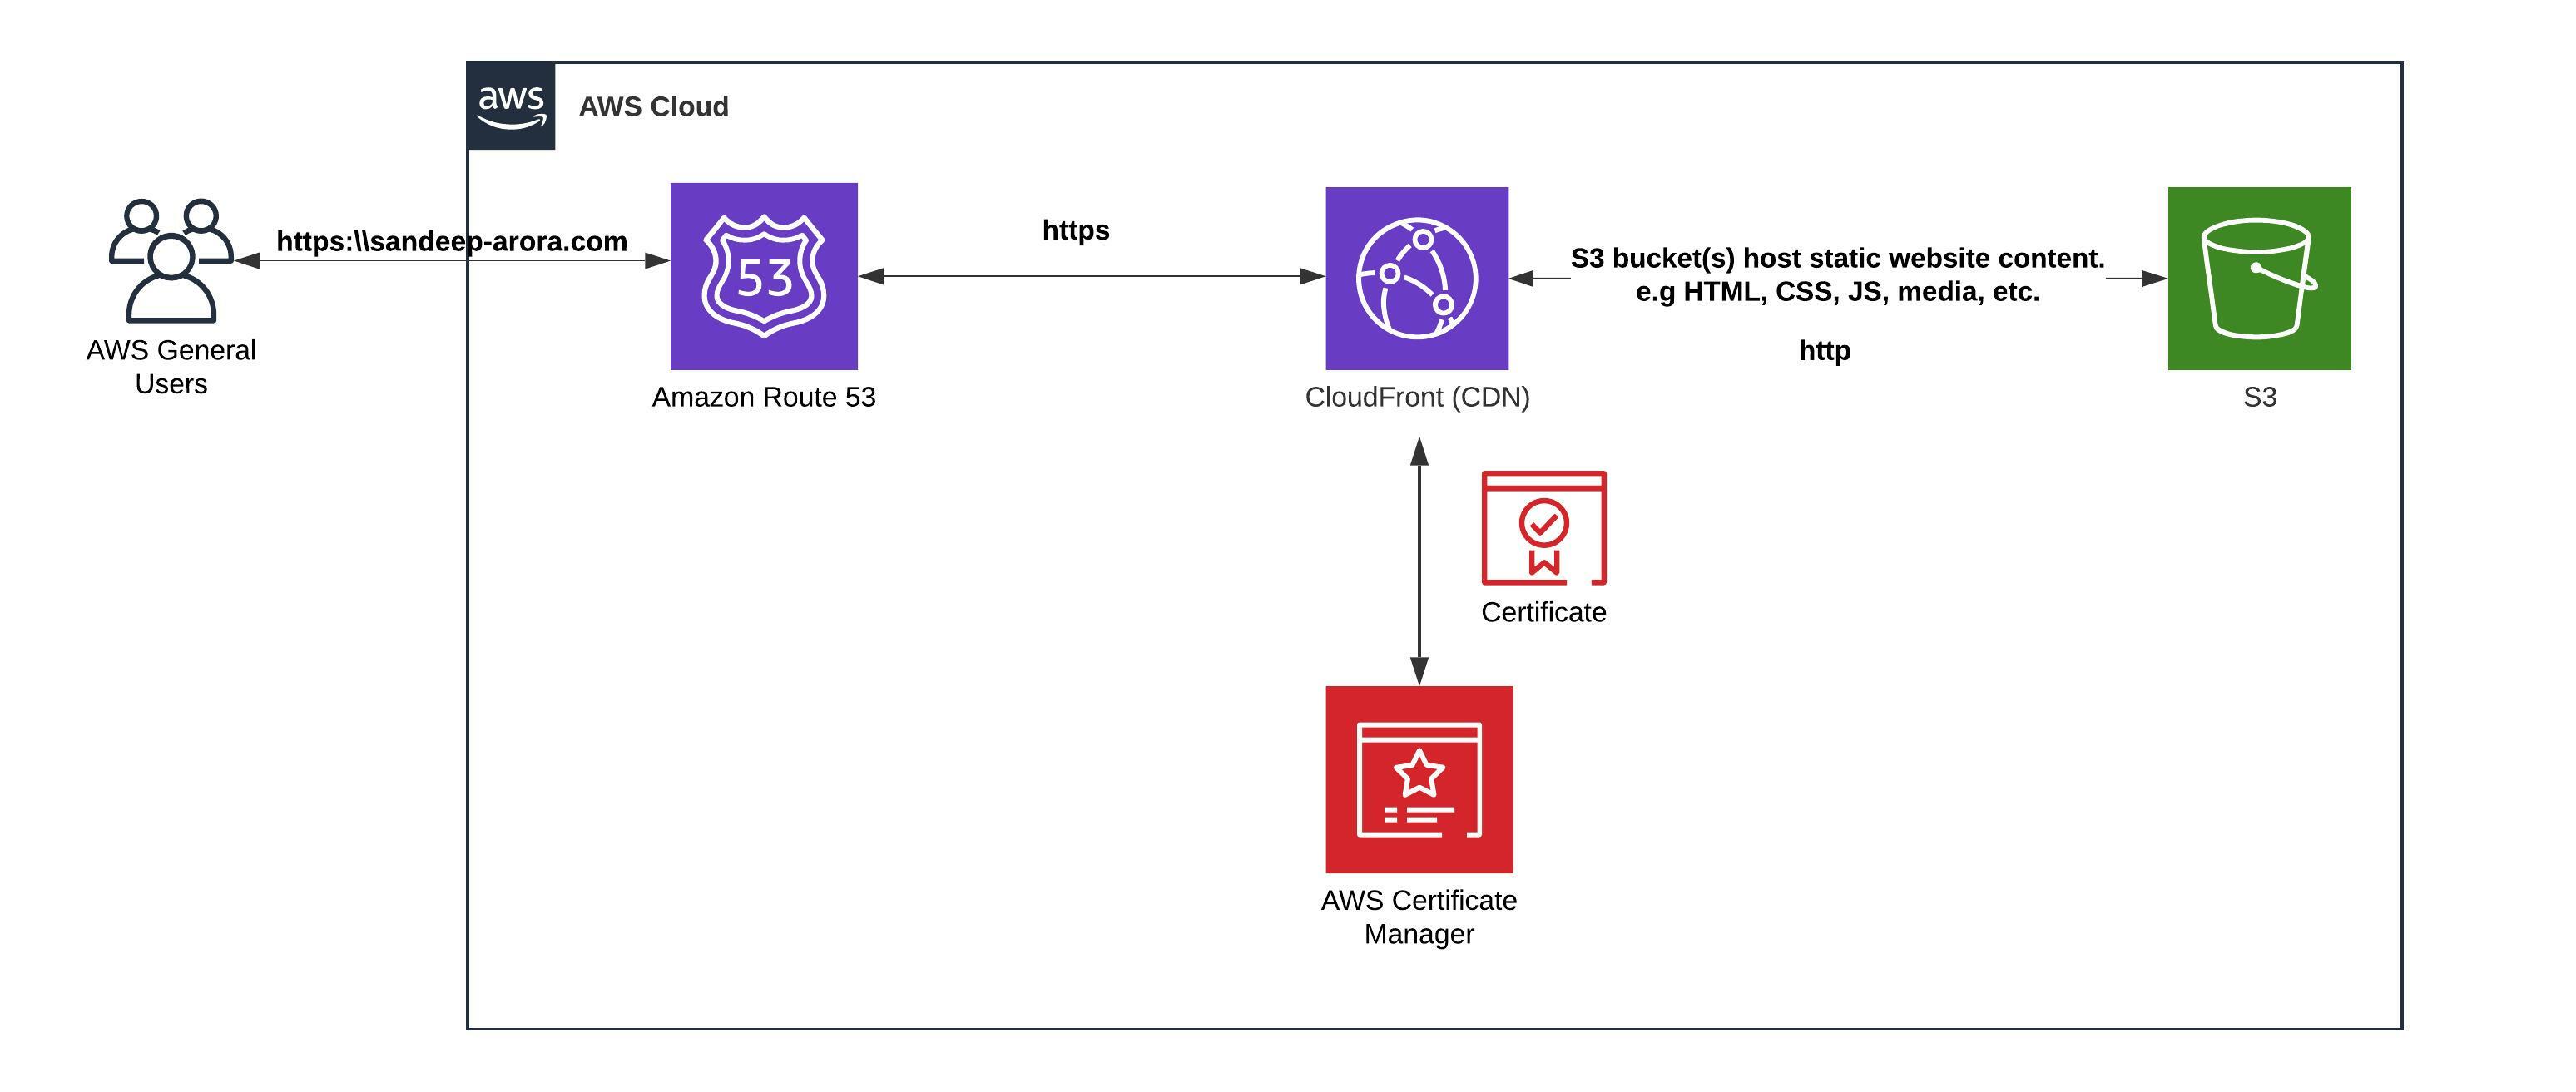
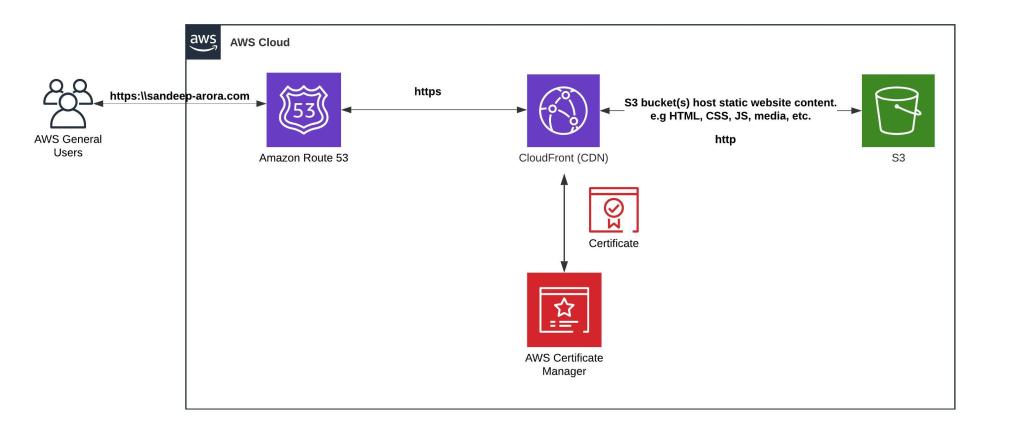
I decided to put my developer hat on and decided to get serious about developing a portfolio website. I already knew where and how I was going to host it (disclaimer: AWS S3, AWS Certificate Manager, Cloudfront and Route53) but first things first I needed a website. Now this post is not about how to create a website but about hosting your website on Amazon S3. So let’s get started.
High Level Design
Create a S3 bucket and enable static website hosting
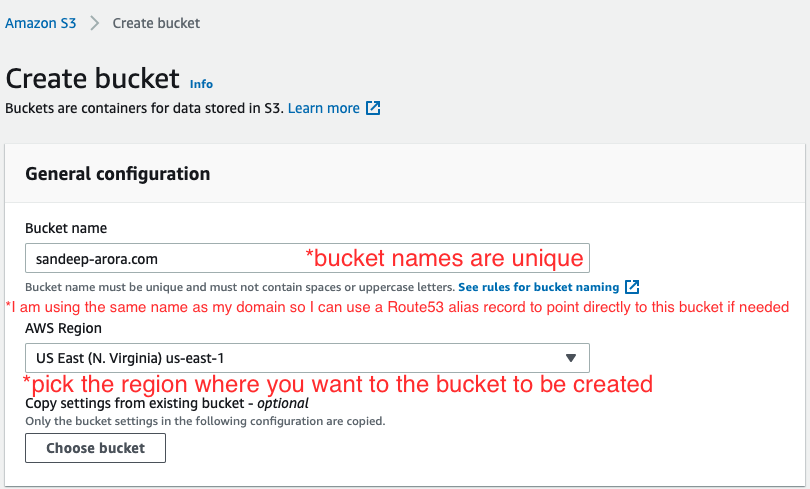
Amazon S3 can be used to host a static website. A static website include static content or they might also include client-side scripts. To enable your S3 bucket to host static content you need for create a S3 bucket
- Navigate to the S3 console and click on Create Bucket

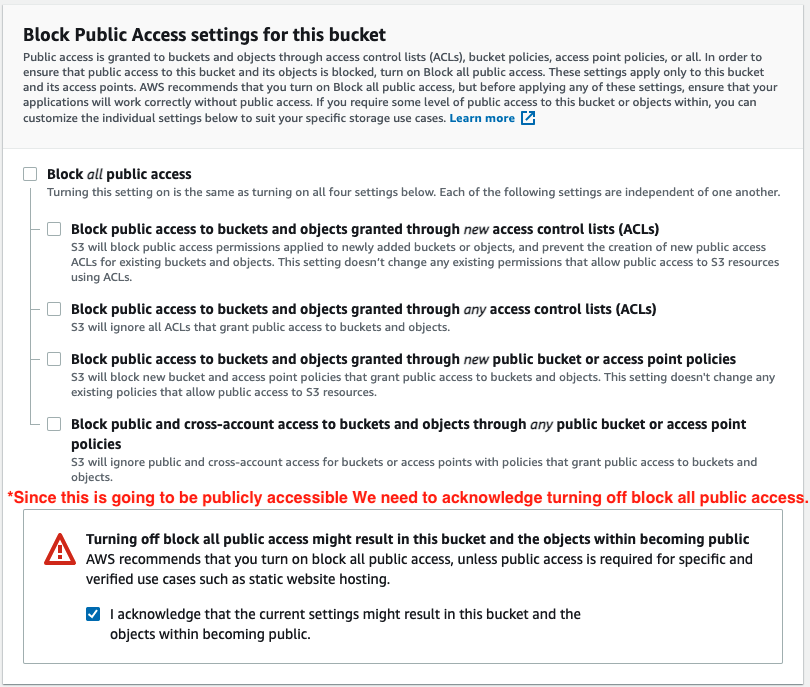


3. Update the bucket policy to allow public read access to make the contents of your bucket public. You will need to Click on the bucket name and then navigate to permissions tab and scroll down to Bucket Policy section > Click Edit and paste the following bucket policy. Make sure to replace the <You Bucket Name> placeholder in the policy with the bucket name you selected for you bucket. In my case it is sandeep-arora.com
{
    "Version": "2012-10-17",
    "Statement": [
        {
            "Sid": "PublicRead",
            "Effect": "Allow",
            "Principal": "*",
            "Action": [
                "s3:GetObject",
                "s3:GetObjectVersion"
            ],
            "Resource": "arn:aws:s3:::<Your Bucket Name>.com/*"
        }
    ]
}
4. Now you need to upload your index.html file and you static content to the bucket.
5. Use the AWS S3 SYNC command to get you content copied in to the S3 bucket. Navigate to the folder where the source code for the static website it kept and issue AWS SYNC to S3 bucket to copy over the content of the local folder to S3.
aws s3 sync . s3://sandeep-arora.com
“.” here represents the current location (I have already changed my directory to the location of the web content) and then for destination (s3://sandeep-arora.com), I am syncing the content to the bucket I created in step#2.
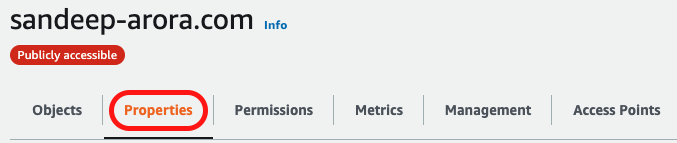
6. Now navigate to the Properties tab of your bucket where we need to turn on the static web hosting for the S3 bucket.
7. Scroll down to the bottom where is says Static Web Hosting and click on Edit
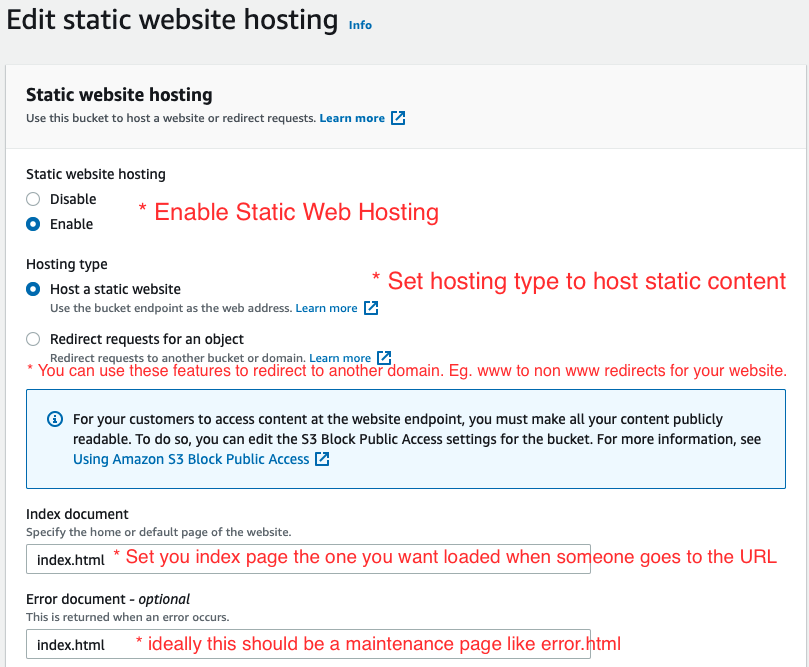
Save the changes and click on Save Changes button at the bottom.
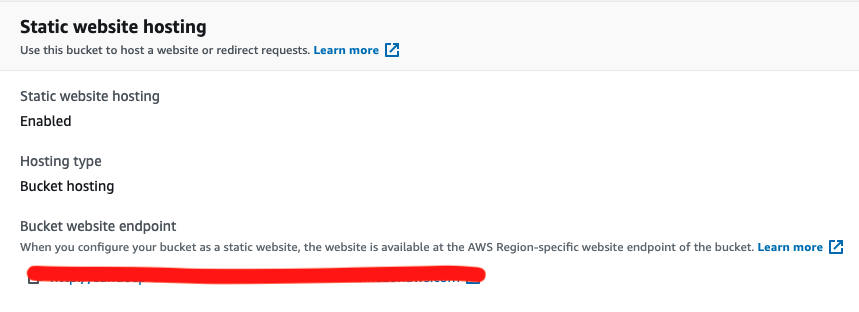
8. You you have saved the changes you should see URL for website endpoint. Click on it and makes sure that everything is working and you web content loads as expected.
Now we need to enable SSL for the website, enable content caching and map my custom domain to this endpoint.
Setup your domain in Route53
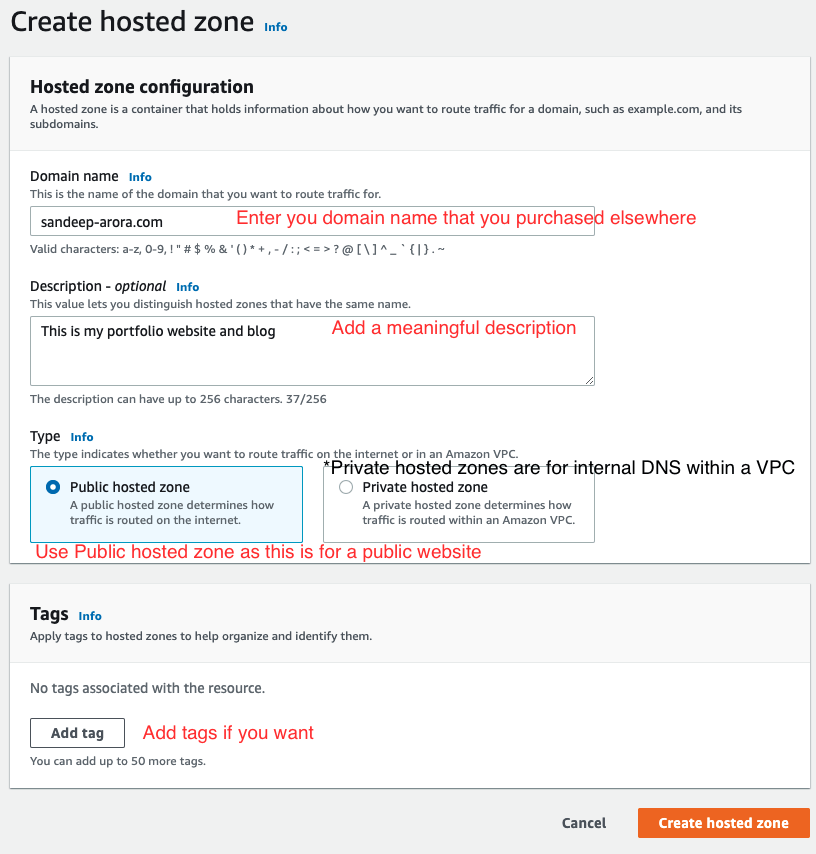
We will use Route53 public hosted zone and that will holds information about how you to route traffic on the internet for a specific domain, such as sandeep-arora.com, and it’s subdomains (blog.sandeep-arora.com). You get a public hosted zone in one of two ways:
- You can register a domain with Route 53, and a hosted zone is created for you automatically.
- You can transfer DNS service for an existing domain to Route 53, and for that you will start by creating a hosted zone.
Now in my case I purchased my domain from Godaddy and will need to transfer DNS service to Route53.
- Create a hosted zone in Route53. Navigate to Route53 > Hosted Zones and click on Create hosted zone

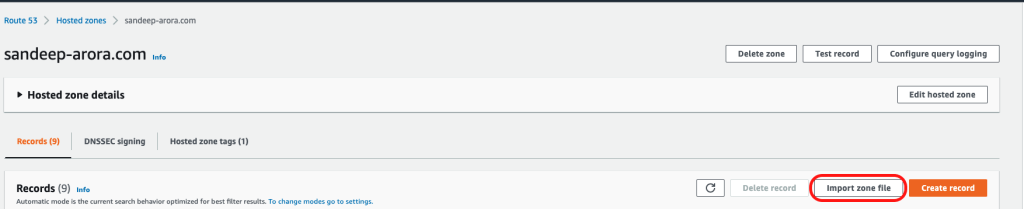
3. To transfer the domain services to Route53 you need update the name servers in GoDaddy DNS Manager. If you are working with an inactive domain, then you won’t have to worry about existing DNS records because there won’t be any. For an active domain name however, you will likely need export existing records so that you can import the records to the hosted zone that you have created on Route 53. To get started login to GoDaddy and click on DNS for your product under Domains.

4. If you domain is a active domain name then under Advanced features you can export the zone file
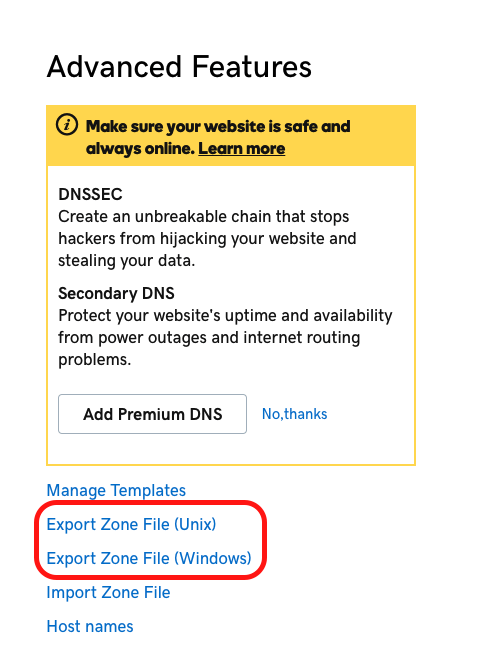
Note: Migrating active domain names can be tricky and can cause downtime. I would recommend that you do check out official documentation for migrating in use domains.
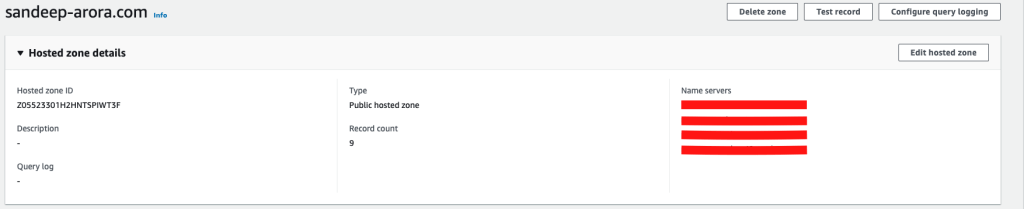
6. Now you will need to update Nameservers in GoDaddy and replace them with Name servers that gets generated upon creation of a hosted zone. Copy the name servers and add them into GoDaddy. You can find the name servers details in your hosted zone.
7. In the GoDaddy DNS Manager change the Nameservers and use the one copied from name servers in Route53 hosted zone.
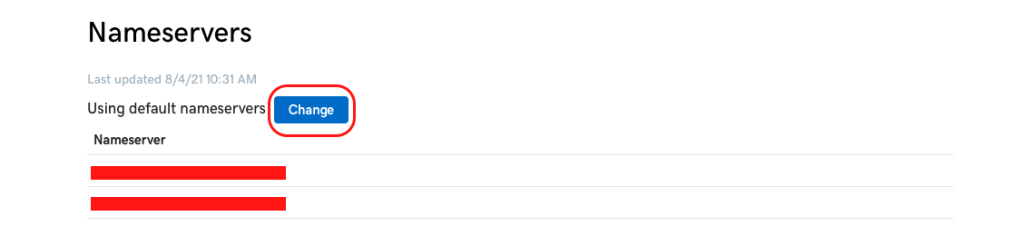
8. You can successfully transferred you domain services to Route53 after this change and GoDaddy will display you a message that “We can’t display your DNS information because your nameservers aren’t managed by us.”
Get a public certificate issued for you domain using AWS Certificate Manager
We need to get a public certificate issued and we are going to use AWS Certificate Manger for that and requesting a public certificate from ACM is free. You are not subject to an additional charge for SSL/TLS certificates that you manage with AWS Certificate Manager. You pay only for the AWS resources that you create to run your website which in this case if S3 and CloudFront.
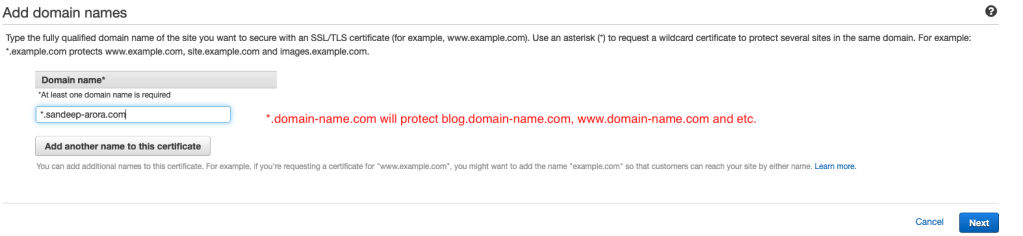
- Navigate to AWS Certificate Manager and request a public certificate

2. Add you domain name you want the certificate to be issued for
4. Add relevant tags for the certificate.
5. Review the request > Confirm and request
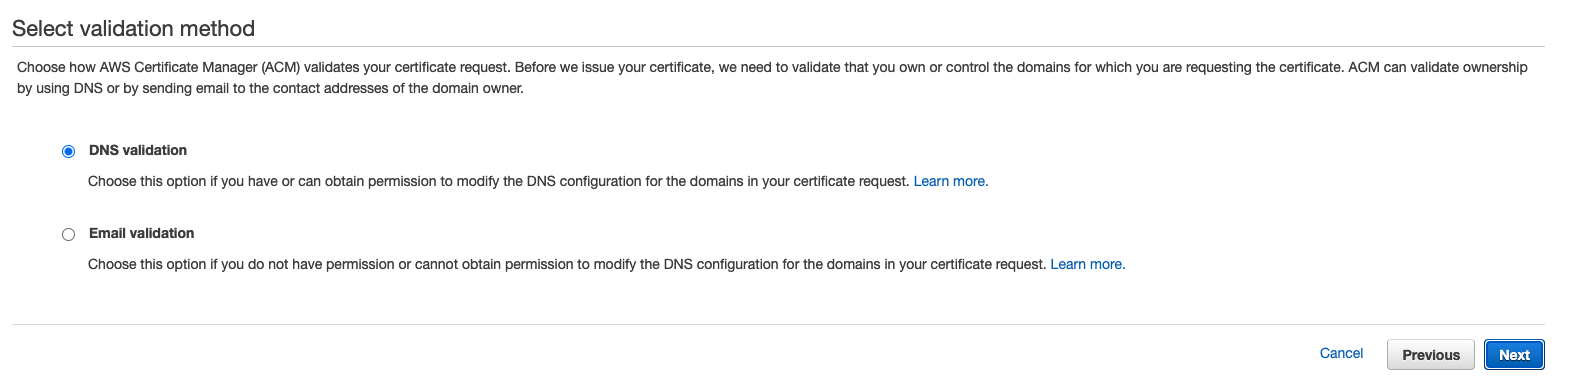
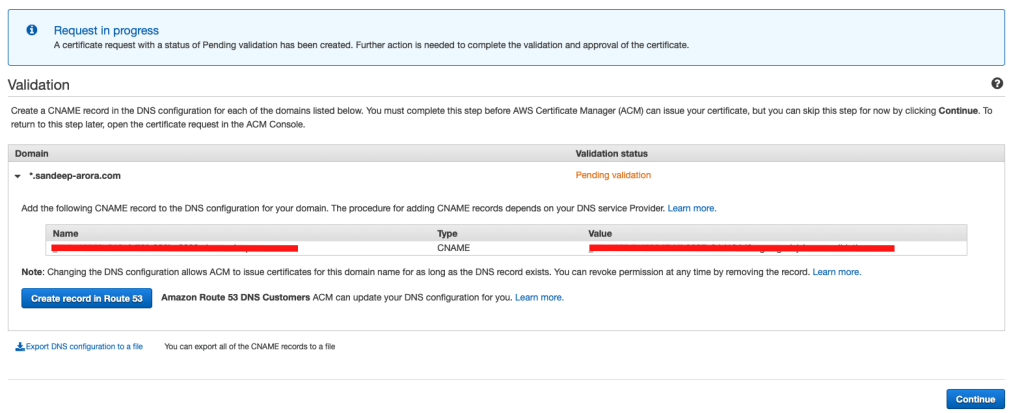
6. Next you will be asked to validate the request by adding the records in Route53. By Clicking on Create record in Route53 you can add the records in Route53 and you will get you certificate issues successfully.
7. Once issued you should see details in the console as shown below

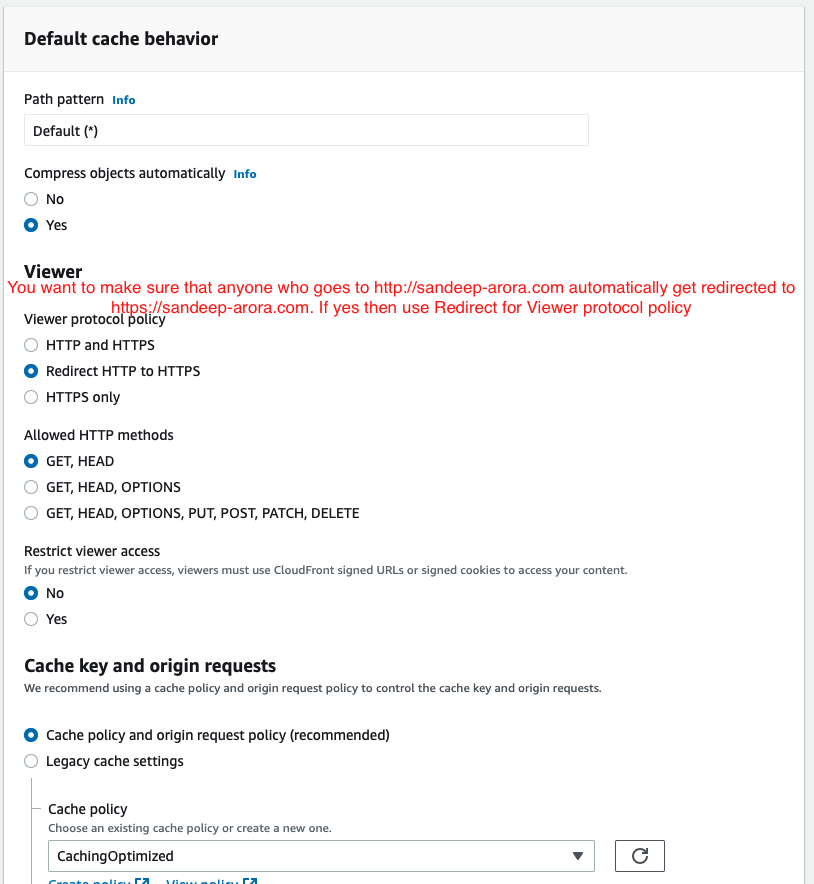
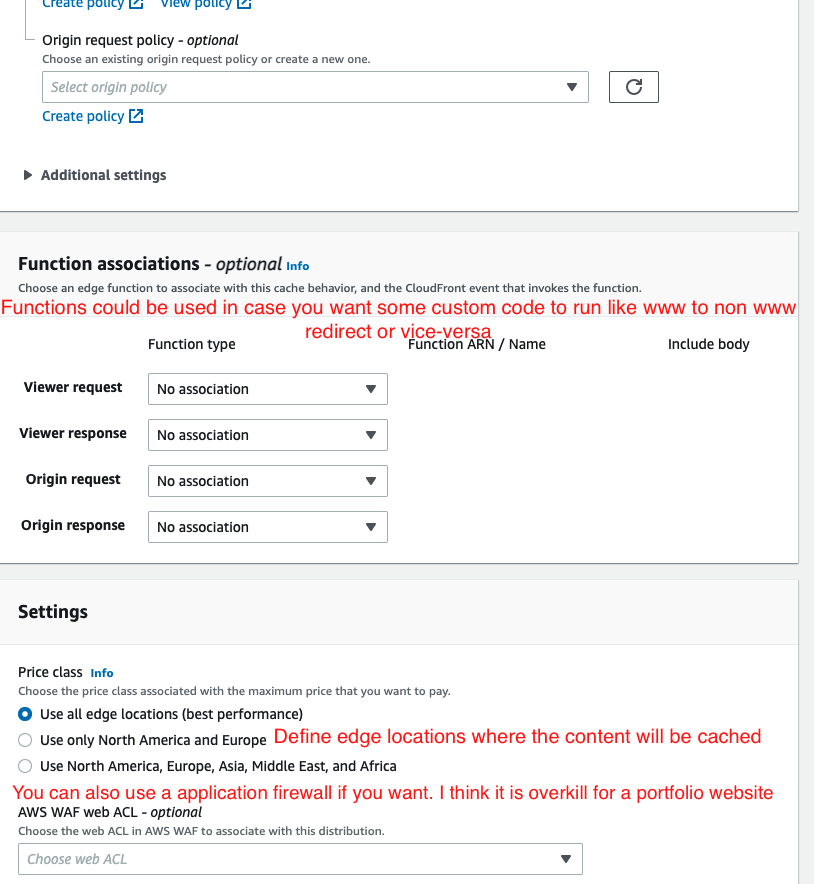
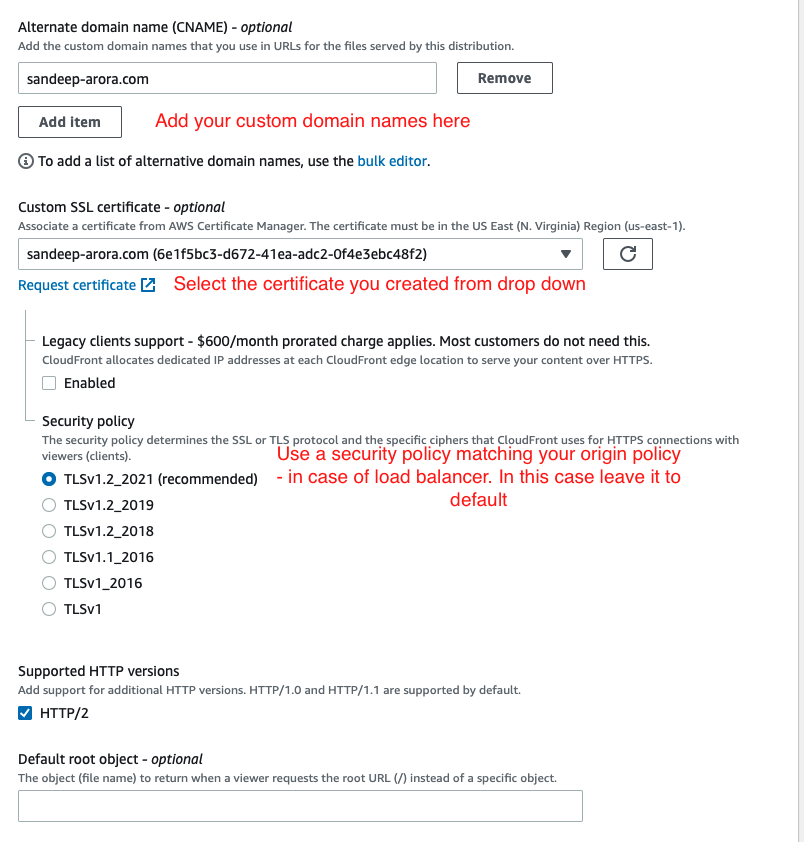
Enable content caching and SSL for your website using CloudFront
Now we will enable content caching and enable SSL for our website. For that we will create a cloudfront distribution.
- Navigate to Cloudfront and click on Create distribution


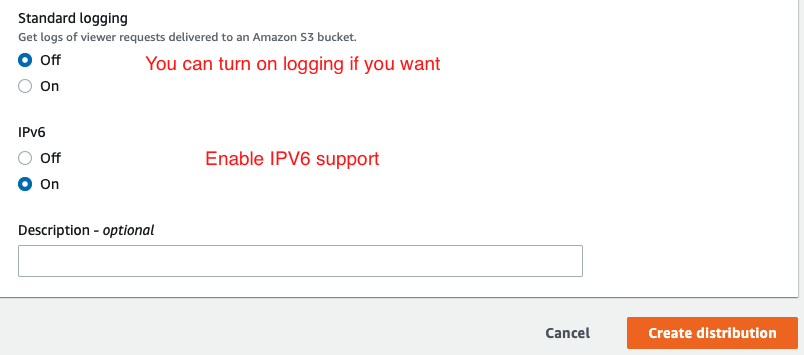
3. Click on create distribution and wait for status to be enabled

4. Test the distribution endpoint and ensure it is working as expected.
Add a record in Route53 to point to CloudFront endpoint
- Navigate to Route53 hosted zone and create a record

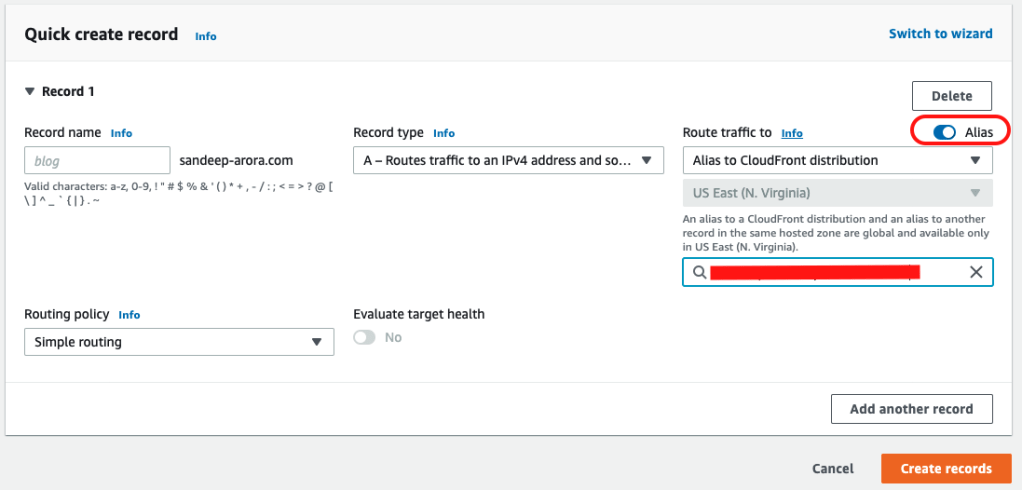
3. Wait for some time for DNS to propagate and then you can go to you website and see the main page loading successfully https://sandeep-arora.com. You can also try to go to http://sandeep-arora.com and you will be redirected to https.
Congratulations! you can have successfully hosted you website on a durable and highly available object store. You have enabled content caching for your website which will help improve the load time for you website in different locations across globe. You have also enabled SSL on you website without paying anything the public certificate and you have a kick-ass website hosted on a serverless infrastructure.
